Dear faithful users and intrigued future users of DiscoverText,
My name’s Josh and I’m one of 3 user support specialists at Texifter LLC. For my first Texifter blog entry, I’m going to demonstrate how I’ve been using DiscoverText to capture minute-to-minute protest tweets in the Middle East, ever since the beginning of the Arab Spring. Then I’m going to show off some of the awesome functions that DiscoverText lets you perform with that data.
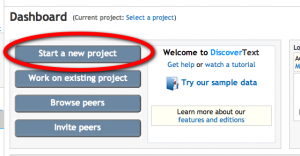
To get started go to your dashboard and click start a new project. Then name your project, and you’re ready to go. (see below)

Now you’ve got a completely empty project that you want to fill with lots of data. In DiscoverText you can import your own data from your computer, or you can pull it offline from Facebook, Twitter, YouTube, and other places. For this blog entry, I’ll be sticking with Twitter, only because that’s where so much exciting stuff is happening.
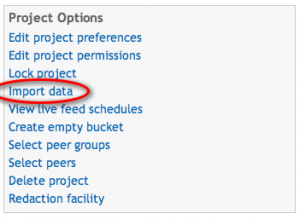
So to import a twitter feed, click “Import data” under Project Options (see below).
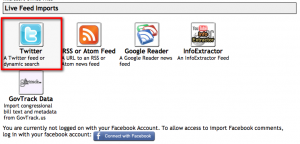
Next, you’ll see a whole bunch ways to bring data into DiscoverText. Click the Twitter icon.
Next you’ll need to name the archive where your tweets are going be stored. Below, you can see that that I named this archive after what I’m initially interested in getting some information about: The City of Hama.

Now, type in your twitter search term, click the Twitter sign in button, and then click next.

The last step before you import tweets is something called the “Live Feed Scheduler. This feature allows you to continuously or periodically pull tweets into your account, even when you are not online. If you’d like to just get as many tweets as you can (there is a maximum of 1500 for each import), as fast as you can, just leave almost everything as is, but click the drop-down menu where it says 1 hour and change it to 5 minutes. Never fear, you can always run multiple feeds, if need be. (And you might want to if each import is producing over 1500 tweets per 5 minutes… using this technique, some users have searched MILLIONS of tweets at one time!!! Are you up for the task!?!)

At last, your tweets are coming soon. Grab a quick cup of coffee and your data will be ready in a couple minutes. You can also follow the progress of the data import beneath the notifications link if you’re feeling impatient. (see below)

At last, the cool part has arrived and you should now see the name of your archive in the navigation tree on the left side.

Usually the first thing I’ll do before I start playing with a twitter archive is I’ll have a quick glance at the the comments. So I click the name of the new archive in the navigation tree and then click the listing options button (it looks like this:  ) at the center-top. Select 100 items per page and click save.

Now you can browse the tweets easily..

Now let’s say you want to start organizing the tweets according to content. In the example above, we can see every mention of the City of Hama, but now you would like to see every mention of – say – the army, the police, and the secret service within Hama. DiscoverText makes it super easy to do this. At the top of your document list, type your first search term and press enter.

If you’d like to keep your new search results, select the checkboxes of those tweets that you want to sort and then click add to bucket: “Selected.” (Buckets are your saved searches) Create a bucket name and perform the remainder of your searches. (see below)
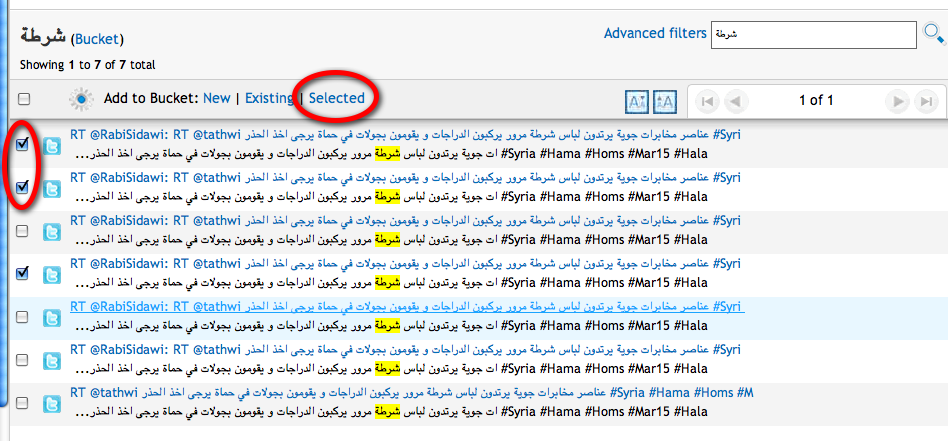

Here are the results on a search for “Secret Service”….

and the search results for the Army…

Just like that, you can analyze what tweets are saying about the government’s behavior in one particular city. (For example, It took me just a few minutes to figure out that police officers in Hama have (supposedly) been walking around in civilian clothing!)
Now, let’s expand the search! Instead of just pulling in tweets about Hama, let’s also pull in tweets about Aleppo, Homs, Damascus, and Deir el-Zur. All you have to do is right click the name of the project, click import data, and repeat the process above.

Now, I let DiscoverText import several rounds of tweets, and as you can see from the picture below, I’m now looking at 5 different archives and over 19,000 tweets! (To learn how to remove duplicate tweets, click here)
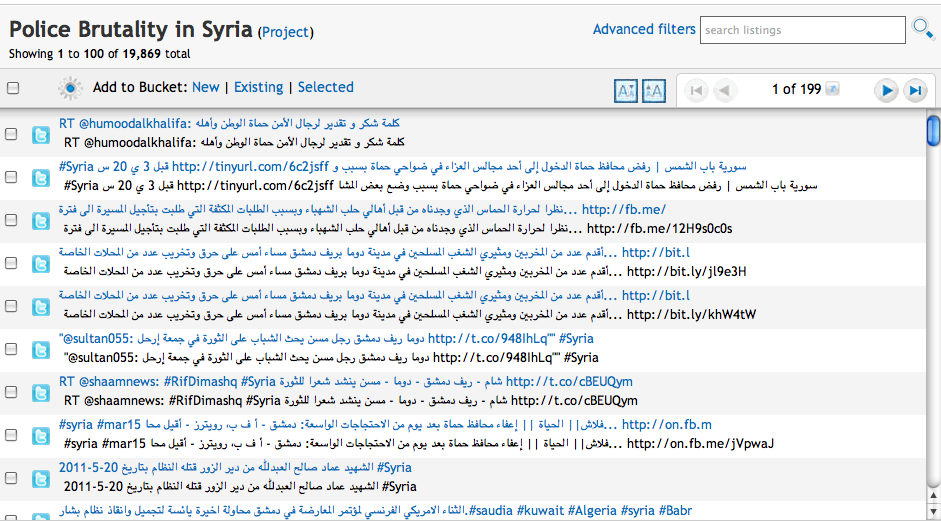
To search all of those archives at once, click the name of the project (in large letters) at the top of the navigation tree.

Now if we search for, “Police,” we can monitor police behavior in all five cities at once.
We can see 72 mentions of police…

and 153 mentions of the Army…

and 44 mentions of the secret service.

Clearly, there is a lot of chatter on twitter about the Syrian army in those 5 cities. Now let’s say you want to organize, categorize, and/or code what is being said about the Army.
The first thing you’ll want to do is create a new bucket, just like you did before.

Next, right click that bucket in the navigation tree and click “create dataset.”

On the next page, click create dataset (or click here to learn more about different kinds of datasets you can design). Next, pick the categories and coding scheme that you’d like to use. As you can see below, I used three different codes, but you can use as few or as many as you want. When you’re all set, click finished.

The next thing t0 do is decide who you want to code the dataset you just created. You can assign it to yourself or any of your peers in DiscoverText. (For more on Peers, click here) When you’re finished assigning coders, click “set chosen coders.”

To start coding right away, click “Code Dataset.” (see above).
This is what coding might look like for you:

When you’re done coding, click the stop icon.
To get a full coding report, all you have to do is click the “Analytics / Export” button on the left, and click “reports”.

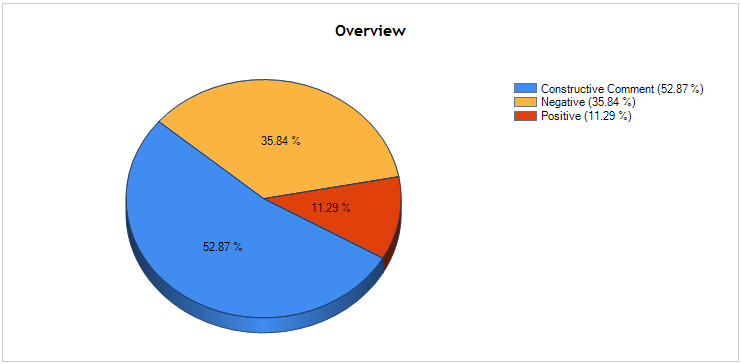
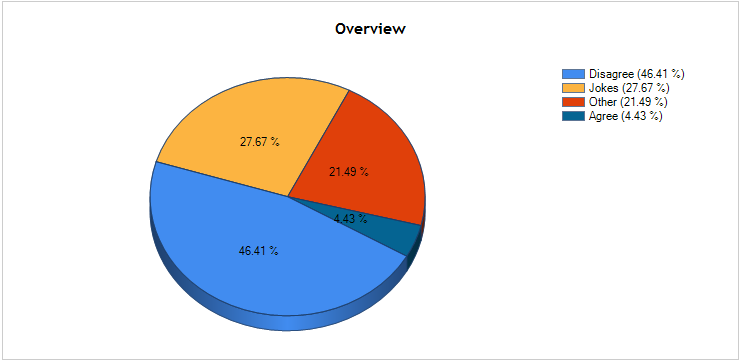
Click “Dataset Summary Report,” customize your report, and a minute later you will be looking at a full report of everything that has been coded, with great visuals that will look something like this:

That’s about all for now. This has been just a glimpse at some of the ways I’ve been playing with DiscoverText. If you like what you’ve seen, sign-up now and “like” us on Facebook and LinkedIn. And, of course, if you have any questions, feel free to e-mail me anytime at josh@discovertext.com. I’m always happy to help!
Enjoy!
 Yesterday, DiscoverText had “rate limits” imposed in terms of its access to Twitter data. As written, the Twitter API allows unauthenticated calls of 150 per hour, per IP address.
![]()

![]() In the near future, look for new developments for DiscoverText. We’ve got big plans for our social media API fetching that will greatly enhance our user’s ability to receive timely and actionable social media feeds. We don’t want to reveal too much right this moment, but we’re sure you’ll like what we have in store and in traditional Texifter style, we’ll plan a large announcement when the time is right.
In the near future, look for new developments for DiscoverText. We’ve got big plans for our social media API fetching that will greatly enhance our user’s ability to receive timely and actionable social media feeds. We don’t want to reveal too much right this moment, but we’re sure you’ll like what we have in store and in traditional Texifter style, we’ll plan a large announcement when the time is right.


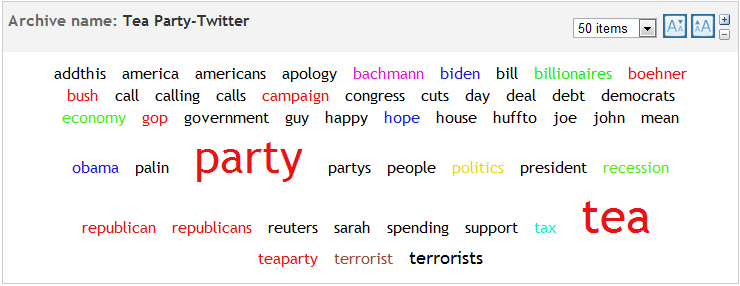


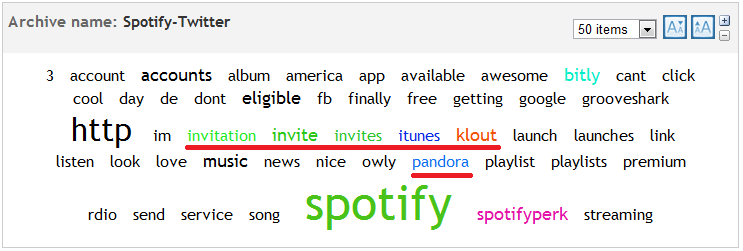
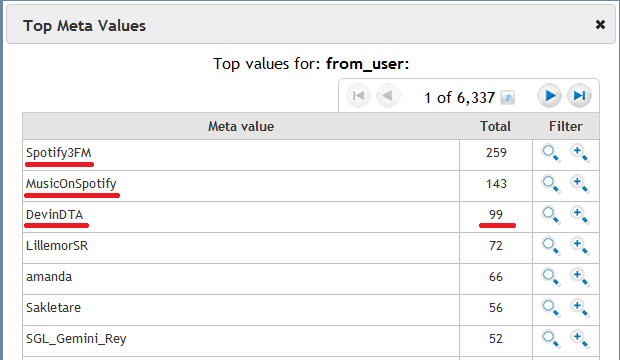










ACUS Calls for ‘Reliable Comment Analysis Software’
The ACUS report continues:
At Texifter, we know quite a bit about best practices for sorting duplicate and near duplicate public comments. We have supported and trained Public Comment Analysis Toolkit (PCAT) and DiscoverText users at the USDA, NOAA, FCC, NLRB, SBA, USFWS, and Treasury departments. Our duplicate detection and near-duplicate clustering saves agencies from the expense of manually sorting non-substantive modified form letters . DiscoverText is now used in Europe by aviation regulators.
How did we get here? More than 300 agency officials attended workshops, focus groups and interviews over a 10-year period. Algorithms were developed and tested. Interfaces were designed, built, tested and re-built. Agencies shared millions of public comments and guided us as we tailored a system to work with the bulk downloads from their email servers and the Federal Docket Management System, which gathers the nation’s public comments at Regulations.gov. If “reliable comment analysis software” is n eeded, Texifter’s flagship product DiscoverText has to be considered a guiding light for some of the key ACUS findings.